Author
TYPE
The Raincoat
PART 5 - Building a passive house
The frames are up!
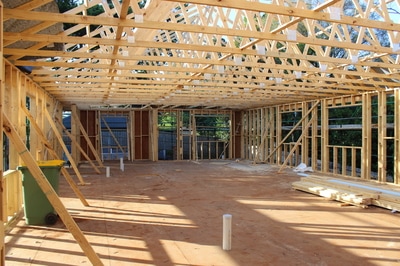
I am sure I join a chorus of builders wives when I say that your own home is always at the bottom of the list of priorities amongst all the other projects. Nevertheless, we have made progress and it has been very exciting to see the walls of the house being built. The external wall frames are 140mm thick versus the standard 90mm studs used on most homes, this meant that the frames were built onsite rather than pre-fabricated. We need the frames to be this thick to fit all the insulation required later down the track. We are also only building the external walls at this stage, this is so that when we come to the internal wrap we will have no wall junctions to navigate. I will explain this further when we are up-to that stage.
Next, the roof trusses were installed, these were pre-frabricated and therefore nice and quick to put together.


Sealing the building envelope
Now onto our weather tight wrap, which is the first step in making a sealed building envelope. In my mind the way I like to think about the building envelope is to equate it to clothing we would wear. So working from the outside-in the weather tight wrap is like a raincoat/wind breaker. The insulation is the warm down jacket and the internal air tight wrap are the thermals. We are effectively creating what I call a house onesie, but I will explain more about the thermal envelope in future blogs. In the below cross-section you can see that the weather tight wrap is the green dotted line.

On the roof trusses we used Pro-Clima Solitex Mento. As you can see from the photos this was installed on the external side of the roof trusses, all the joins in the wrap are taped then timber battens were fixed onto the trusses for the colourbond roof to be layed.


Mind the gap
We have begun wrapping the external walls of the house. In a similar fashion to the roof, the walls are also wrapped in Pro-Clima Solitex Extasana with all the joins taped. On this wrap we have started to install all the battens for the weatherboards and pine lining for the eaves will be fixed onto. The battens play a two part role, firstly so the weatherboards can be fixed to them, to keep puncturing the wrap to a minimum. Secondly it is going to act as a 35mm service cavity for things such as electrical and plumbing needs (i.e. electrical cable, hot and cold water supply, green recycled water supply from the water tanks and cable needed for the electrical solar system). The service cavity is there so we are not taking up space in the wall frames with these services and to keep the wall insulation consistent.
You can see in the photos how the black wrap that is under the floor, has come up over the floor joists to overlap the wall wrap. At this stage we have also gone straight over most of the window openings with the wrap, this is so we can cut it back later and make sure there is enough wrap to tape correctly to the windows.


Wrapping the home correctly is a critical part of the build in ensuring the building envelope is tight with no gaps.
Dreaming of a new home?
Let's get started


